Today continued the go through process, identifying parts and components that will be replacing. Still need to wash it really well. Given the fact that Lilly is still not registered yet due to waiting on duplicate title, can not get to a car wash facility and my apartment complex is against washing of vehicles in your spaces. So until I wash it, I can not start cleaning and buffing the exterior.
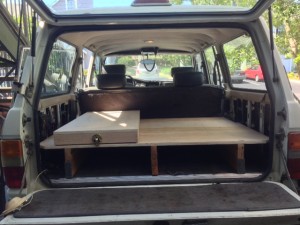
 I did however make some head way on the rear compartment. My ideas of totally redesigning it, for easier access to the fridge and adding some camp gear compartments, did not pan out well. After much trials and manipulation, the way to go was to improve the original design. Worked well for a long time. I did replace the main platform, needed a thicker base since the last one was fairly thin. Also made it a hair smaller overall to allow putting the side panels back on, I shaved about a half inch each side. Originally I had it setup for two different sizes of containers underneath, why I originally went that route still confuses me, but I made both areas the same size.
I wanted to go with something like a big box type setup, for easy removal if I wanted to haul something that the drawers would interfere. After laying stuff out and where to put things, it just wasn’t practical for my uses. This way I still have my compressor in the same location, and I might hinge the right side to access the smaller compartment easier.
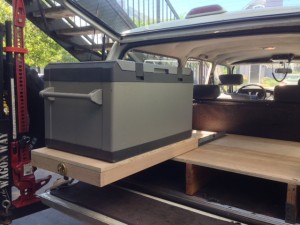
 The fridge. Most people get by with various options with their fridge locations, mainly because most don’t have very large fridges. You can get by putting a 40-45QT fridge on the deck off to the side because it won’t be big enough to hit the fender well. Well, Tony and I have the large 80QT’s and there really is only two places to put it, right half or left half of your back compartment, and about 8 inches higher than the floor. So, I had to have it where I’ve always had it, on top of the drawer compartment. I have wanted to make it slide out for some time, at least making it somewhat easier to see whats in there without crawling inside. I made a base with 24″ slides, full extension. With the weight of the fridge, another reason I changed out the base to a thicker piece. Nothing too fancy, just wanted something to look nice but functional of course. It does slide out 24 inches, though still not far enough for full lid opening, but definitely easier to look into. I used a generic latch from Home Depot to secure it in place. I will be securing the fridge to the slide with turn buckles.
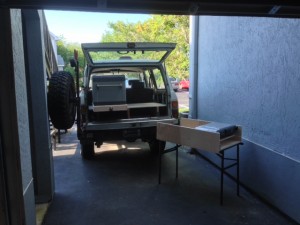
 Also got started on a camp kitchen box. I would have like to integrate it into the existing base of the drawer system, but no matter how I had it I would loose space for tools, parts and recovery equipment. I decided then to make it a separate box I can secure on top when needed. I bought a cheap folding table and took the sub frame and legs off and am building the box to that. As for the arrangement of things in the box itself, that is still being planned out. I have a couple ideas in mind, we’ll see how thing work in reality. I do think this will work out well, one stop pickup for camp stuff, and we’re off.
All in all, a good day.

