By Tony K
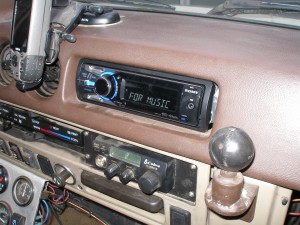
 Not nearly as difficult as you may fear… If like me you got a new stereo the easiest way to install it is to remove the entire dash cap to install the new one. And if I remember correctly when I took out my factory stereo it meant the cap had to come out anyway. While this deals with the early dash cap, the one in a 62 is not all that different.
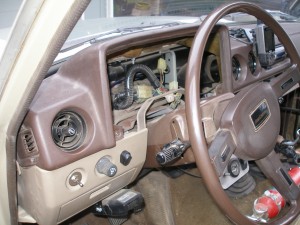
Approach this methodically and it is really simple. First to go is the speedo cluster. It is only held in with 5 screws and on the back there are four wire bundles with quick disconnects. For some reason the speedo cable usually separates itself but if it doesn’t a gentle pull is usually all it takes.
 Next to go is the glove box but even this has its own little order or it won’t come apart. First off is the three screws and then the door just falls off. Be sure to catch it. Next pull the two screws along the top of the box just under the cap. What also has to go is that nut on the push switch for the glove box light. But don’t fret as the nut is actually the switch and pulling it off exposes a quick disconnect for the wire. Look up and remove the catch for the door and now the box will come out. Don’t hurry too much as there is a wire for the light that needs to be disconnected.
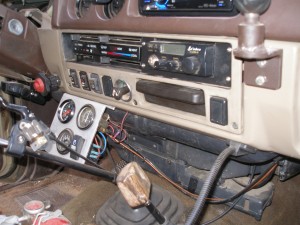
 Now pull the eight screws that hold the lower center section of the dash on. The upper row of screws actually go throught the vinyl cover of the cap and by just lowering this whole panel makes it much easier to remove the cap. Don’t forget the two screws that are accessible once you pull out the ashtray. And all you have to do is lower this, no need to disconnect any of the wiring.
 Now the cap will be fully exposed but there are a few fasteners still to go. If you look at the vents that feed the driver and passenger side windows, no not the adjustable round ones but the little square ones right on the end of the cap opposite the windows, you will need to pull the lower screw. You can see it in the picture. That little screw is holding down the cap. Finally on the home stretch now, look into the opening left by the speedo cluster. To the far left and just about straight in you should see two 10mm nuts that need to be loosened. The threads are facing straight down by the way and you only need to loosen these not completely remove them. A matching set will be inside the glove box opening. But these two are a little more inconvenient due to the vent tubing of the heater system. It may seem surprising to not have any fasteners at the center by someone was thinking and it does have a couple of interlocking flanges that do hold things in place, when the dash lifts out the flanges just slip apart.
Now that all the fasteners are out or loose, all it should take is a gentle pull up and towards you to get it loose. Don’t get too excited though as the side window vent tubing will need to be separated. No tools, the tubing just slips off.
Just a bit of juggling the cap around and you should have clear access to pull the radio connections apart. And like magic the cap is free. Makes it a lot easier to install a new stereo which was the latest reason for me to pull mine and write this down. Also managed to re route the power supply for my GPS and also change out the switch for my fog lights while everything was apart. No reason not to get a few other things done while you are in there. Would have liked to change out the center vents for ones that close but I couldn’t find the ones I thought I had.
 As long as you paid attention to the dis-assembly all it will take to put things back is the reverse of what you just did. About the only thing that you really need to pay attention to is that little metal tab you can see in the pic just to the left of the side vent. The cap has to be behind this tab, the cap tends to go outside of it and then things don’t fit like they should. That and don’t forget to reconnect wires and hoses as you go otherwise you will be taking things back apart…..

