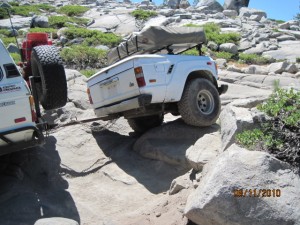
Since meeting Tony, I have never given utility trailers, or the use of them, any thought. After a run down to Tillamook, Oregon, I came to the conclusion that I wanted one. Not that a wagon is not big enough alone, but the idea of not having to load everything inside and crowding up the place was appealing. So the thinking cap went on, and it stayed there for a few months, slowing trying to plan what I would need or want.
Fast forward 8 months, and I am in the middle of doing a transmission swap on Lilly from a donor 60 I bought in Kirkland, WA. Let me tell you, when you bring in a “unsuspecting donor rig” to 2 wagon owners, the donor rig doesn’t stand a chance of survival. When all said and done, there was only a front end, frame and axles left. Tony had a complete rear section from another 62 that was purchase for possible repairs to his BJ.
 So one day while at the Wagon Cave helping out Tony with his BJ rebuild, the thought came of using the rear body section of the 62 as a trailer body. The idea was to box in the front of it and make a top and call it that. That idea was tossed around until I went and grabbed a front fender and placed in over the front axle of the spare frame. How cool would this be! We then realized we should have saved the firewall and used that as the back of the trailer. Oh well. Then I looked at the rear tub section again, and brought the front fender over to it and placed it over the rear wheel and rear tub. Right then, both Tony’s and I “cruiser light bulbs” went off bright. And that’s when the madness began.
Actually making this trailer was a day by day process. The overall look I knew, but how to get there was a different story. My background for doing any type of metal fabrication or welding was zero. Now I could have spent time learning on other smaller projects, but nope, I went full tilt and learned while joining a front and back end of a car together.
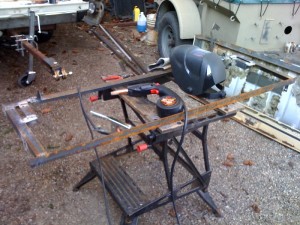 Fortunately, Tony knew how to weld. After some lessons on ARC welding, I was far from ready to go, but I had direction. This also helped reasons purchasing the Ready Welder. I knew there was a lot of sheet metal welding to be done, and ARC welding is a bit much for that. So enters the Ready Welder. After practicing with that one various scrap pieces, I was ready. Out came the cutting discs and it began. Other than the hitches, the entire trailer was made with the Ready Welder.
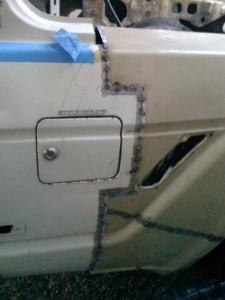 First step was mating the the front fenders to the rear tub. Now this was easier on the side with no gas tank door, just a straight line. On the other side with the door, now that’s where I realized that this is going to be more difficult than a cut here and a cut there and walla! Wanting to keep the door and factory gas tank was the idea. After measuring 15 times and cutting maybe 2 or 3 times, I was able to fit the two pieces together.
Another big part of the front fenders was matching the body lines front to back. Though the 2 main body lines going front to back on a 60 look even the entire way, they infact narrow 3/8″ at the back. If I just welded in the fenders as is, the lines would not match up. I ended up sectioning the fenders 3/8″ and then re-welding up.
 Once the fenders were in position, I was able to determine where the front grill would be positioned on the frame, and where to cut into the inner rear fender wells to allow the front fenders to fit into place. There was a lot of cut and fit, cut more and fit, and many more of that until the fit is what I was looking for and most importantly looked right. This process of small cutting and fitting took a while to do. It’s a tedious job, but something that had to be done, so not to look like a hack job that doesn’t look right.
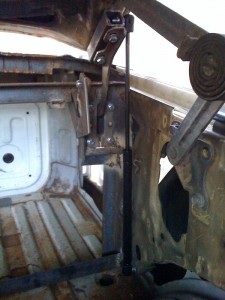 Once the front end was in place, the moment of truth was the hood fitment. Luckily I was able to do things right and it ended up pretty square. A few more minor adjustments were made and I could start bolting stuff together. Being the firewall was no longer there, they mounting place for the hood hinges were missing. I ended up making an internal frame for the front hinges and the later rear hinges. This frame utilized the existing fender mounting holes and is not welded in place. The frame helped out the rigidity of the entire section as well. Gas struts were installed as well in place of the prop rod, which we didnt have from the donor rig.
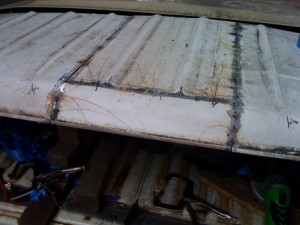
The original plan for the rear top section behind the hood was to be fixed in place and modify the tail gate to open in place. Being that there is no rear windows in place, the body is now wider than where the roof is designed to be, about 10″ wider. In order to be able to have the rear top be the roof of a 60, I had to section out another part of the roof and weld it in to make a wider roof. I used a section of the side rain gutter to fill in the missing rear rain gutter section. Once I had this tack welded in place, I realized that I wanted this rear section to be accessible as well. The new plan was making this part hinged as well. A big side effect that has yet to be fully addressed it when making both parts hinged, the gap between them grew much wider than wanted to. I have had a few ideas to solve this, but none that I want to do, not because of function, but because of looks. Yes, I am one for function over looks, but this is a special case.
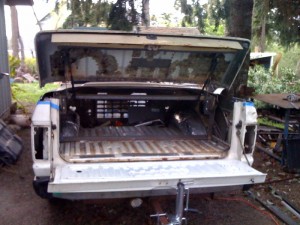 Now that all the major fabrication was done, now came all the little things that 1) tied things together and 2) made it street legal. I was able to mount the front mud flaps facing forward, just swapping sides, that was an unexpected bonus. License plate bracket was made, factory marker lights were installed and wired up. Another Ultimate Hitch was created. The frame was cut off forward of the grill and a new cross member with hitch was made to facilitate a rear tow point. The spare rear bumper was used as the “front bumper” and brake lights were installed.
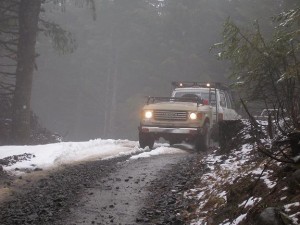 All factory lights, including headlights for back up lights, work expcept for the rear (now front) tail lights. Wanting to have all the original lights work with Lilly comes with a side effect, I can not tow another trailer (or tow the trailer with another vehicle) with the existing trailer wiring. This can be overcome by installing a different trailer plug, but don’t have the need for it right now.
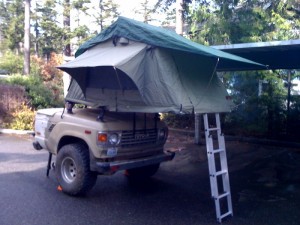 I added a Roof Top Tent to the trailer shortly after. I had seen them on other off-road trailers, and wondered if it would work on this. I ended up mounting it to some Yakima bike racks, which aren’t the best for off-road, and set it up to deploy to the rear. Having it this way enables me to still open the front section when the tent is opened. Now this isn’t a perfect setup. In use, I have needed to get into the hood section while the tent is open, and that poses a bit of a problem. It’s all part of the design, this is the only trailer of its kind, no directions to follow.
The trailer is far from finished, it’s a Land Cruiser. What I tell people about the main difference between Tony’s style trailer and mine is this; Tony’s is built more around “the needs” if you will. Propane tanks, jerry cans, hauling… the trailer is built around all those needs and designed that way. Mine on the other hand is built around “the look”, while trying to incorporate the needs without sacrificing the look. It’s a big challenge, and I realize that I have to make sacrifices in the design and function. Would I change anything? Absolutely not. I accomplished what I envisioned at the beginning, and I am very proud of it. There’s nothing like cars attempting to fly past you on the road only to slow down and drop back for 20-30 seconds trying to figure out what exactly it is I am towing. It still brings a smile to my face every time.
