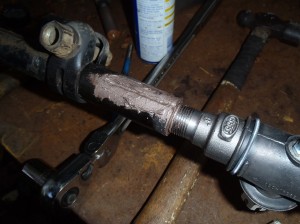
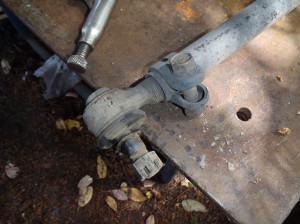
 Like a lot of other 60 owners my 30 year old wagon wasn’t exactly tight in the steering department. I knew it wasn’t the wheel bearings as I had fairly recently done the brakes and other maintenance that eliminated wheel bearings as the problem. And after that I knew I didn’t need to look much further as the steering on my diesel is pretty simple and this goes for all of our 60’s.
The typical problem with our wagons is worn out tie rod ends and relay rod ends. And to be perfectly honest I wasn’t looking forward to this fix. Eric had already made this fix on his rig but for some reason or another I wasn’t around when he did it so I wasn’t sure what I was in for. I actually bought all new tie rod ends and relay rod ends months ago and just kept putting it off. But with a planned trip to Canada coming up I could hold off no longer.
Remove the old parts
This can be as hard or as simple as you like. As for me I like simple. One tie rod fork, a drilling sledge (translation small sledge hammer) and a propane torch. First part is to remove the components from the rig so after removing the nut and cotter key it generally only takes some wacks with the sledge to force apart the ends of the steering components. For the sticky ones a little use of the torch will usually speed things up, just be careful where you point it so there is nothing flammable nearby. You could also use the fancy tools actually made for removing tie rod ends, but they cost money and I already had the other stuff.
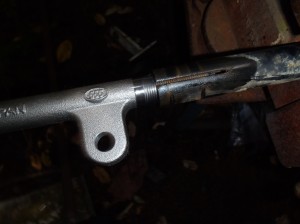 Getting the ends out of the rods is even simpler. Loosen up the clamps and just slide them out of the way as there is no good reason to completely disassemble them. But here is a trick I used to save some adjustments later. Before you take things apart take the time to count the number of threads that are exposed at each end. This will get you close when it comes time to re-assemble and save you a major headache.
Once again the torch heats up the inevitably rusty parts and allows you to simply unscrew the ends without doing damage to the rods that you will re-use. You don’t have to get things red hot and you don’t want to. Just keep checking to see if the ends will unscrew as things get heated up. Things will definitely need to get warm but if things are getting red you better back off with the torch. Take you time and find what works.
If you are not familiar with Anti-Seize now is the time to get to know it. This little compound will make removal of the parts the next time much easier as well as make it easy to make adjustments if you get things a bit off and need to re-adjust the the toe in.
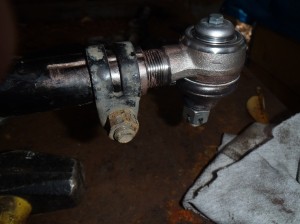 Apply a liberal amount of Anti Sieze and screw in the new ends. And remember those threads you counted? Spin the new ends in until the same number of threads are showing and you will be really close to where you want without measuring anything.
Re install all the steering rods
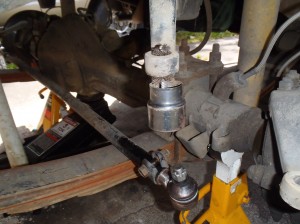 While you don’t often get rust in the tapered sockets where all the components came out of, I thought it would be a good idea to give them a quick clean up. The battery post cleaner tool I have was just the ticket for this job, an already tapered wire brush.
Once again a quick swipe with some anti-seize and the ends and rods were bolted back to the knuckles and the pitman arm. Be 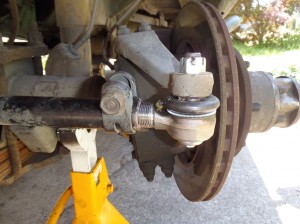 sure to use the factory specs for torqueing things down. 67 ft lbs for the castle nuts and 33 ft lbs for the clamps that hold the rods tight to the ends once everything is adjusted.
Check the toe in
Toe in is pretty easy to check. Jack up the front of the rig so both wheels are off the ground. Get yourself a scratch awl and find a place that you can mark on the tread. Use an extra jack stand to support the awl close to the tire. Now spin the tire hard and lightly hold the awl against the tire to leave a mark all the way around the circumference. Do this to both tires.
With some help measure the distance between the lines on the front of the tires and the back of the tires. The smaller measurement on the front side (or should be) is the toe in. Loosening the clamps on the tie rod ends will allow you to spin the rod and move the ends in or out. How? Something you should have noticed when you put the ends into the rods, one has left hand threads and the other right hand. Turning the rod will make it longer or shorter depending on the direction you turn it. This is exactly how turn buckles work.
Test ride
Since I had used the cheater method of counting the threads to put my rods back together I just took it for a test ride. Actually measuring the toe in will come in a few days when I have more time. Or sooner if I notice any unusual wear on the tires.
No surprises with the new ends but I did have to adjust my steering wheel. On a straight stretch of road it is not exactly pointing the correct way. But this is an easy fix that can done one of two ways. You can loosen all the clamps and remove the steering stabilizer, then use the turnbuckle feature of the ends to straighten it out. Or you can use the simple method… Remove the steering wheel, turn it to line it back up straight, slip it on the splines and re-install the nut.
Tighten up the steering box
The other issue I had on the test drive was some slop in the steering box. And since I have a manual steering box there is a bit of adjustment with a set screw and lock nut. This screw sets the preload on the sector shaft and when tightened up a bit it took all the slop out of my steering wheel. Only found this out when I at first turned it the wrong way and loosened things up! This is by no means a permanent fix and my steering box is probably due for a rebuild, which shouldn’t be too hard if I can get the parts.
So all in all there really was no reason to put things off. Thinking about it made things way more difficult than reality proved things to be. So get some new parts and dive in, you won’t be sorry. And enjoy those shiny parts as they won’t be that way for long!

