By Tony K & Eric B
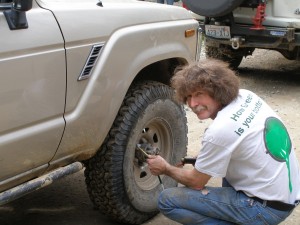 My original air supply was nothing more than a cheesy little compressor that plugged in to the cig lighter. While it did work it had severe limitations. I decided to install an upgraded air system and it is more than adequate for how I use it. It runs my lockers, airs up my tires, blows dirt out of places it shouldn’t be and will run some tools on a very limited basis.
The system is made up of a compressor, an air tank, 2 regulators, air lines and switches to control it.
-The Heart of the System–
The compressor supplies the pressure needed to operate. Just what you use for a compressor is important. There are two main factors on deciding what compressor to use, output and duty cycle. And these in turn are determined by how you use your compressor. If you want to run serious air tools you need lots of volume. Air tools require a large amount of air, rated in cubic feet per minute. To do this you need an engine driven compressor or a very expensive DC powered model. Something not all of us need. I did see my dream compressor on a tire service truck once, unlimited air and massive cfm output, asked the driver about it too but 10K is out of my budget….
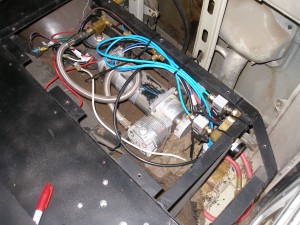 What is more important to us as wheelers is duty cycle. Lots of small compressors are available but be sure to check the duty cyle before you buy one. Duty cycle is how long the compressor can run before you have to let it rest, usually rated in a percentage that you get to convert to time, for example a 25% duty cycle compressor can only run for 5 minutes and then has to rest for 15 minutes. A better option is to install a 100% duty cycle compressor, this means the compressor can run continuosly, end of story. They cost a little more but are worth it. I have a Viar 480C installed in my rig. It is rated at 200psi output and a 100% duty cycle. I installed my compressor on the inside of my rig back in the tool box. This way it is out of the weather and well protected with a dry and clean source for air.
And remember psi and cfm ratings are totally different. At full output, my compressor only puts out a miniscule amount of cfm. Even though a lower pressure puts out a higher cfm it is still not enough to run most air tools.
Limited run time (duty cycle) can become a problem when airing up tires at the end of the day. And lest you forget to let your compressor rest, most of them have internal protection that will shut them down until they cool off. This became readily apparent at the end of Rubicon with lots of tires to air up and it was still pretty warm at 9 at night. Everyone elses compressor shut off while mine aired up several rigs and didn’t stop till I shut it off.
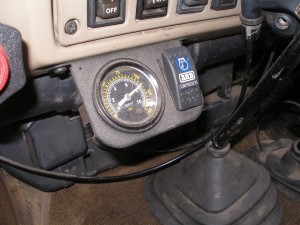 –Master Switch and Pressure Regulator-
The on/off switch and system pressure gauge is mounted in a handy spot on the dash. Easy to see and access when needed. Most of the time I leave the system off. The pressure regulator is mounted back by the compressor. This thing is needed to tell the compressor to shut off once the system is up to pressure. Readily available and not that expensive. My main regulator is non adjustable and is rated to shut off at 135psi. This is the max pressure maintained in the system. It also tells the system to start back up once the pressure drops to around 90psi.
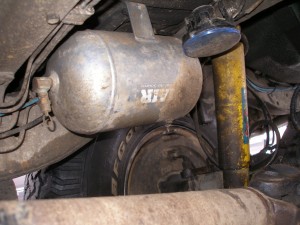 –Air Tank-
I installed an air tank so when running my air lockers (which take very little air to run), my compressor doesn’t run continuosly. I am only running a one gallon tank which is more than adequate. For the most part once my system is up to pressure the compressor will not come on for the lockers more than once or twice a day. I should also point out that a large air tank will not make up for the lack of a high cfm compressor. I read once about someone who installed a four gallon tank and as soon as one tire was aired up you were back to relying on the compressor for air. Tools will go through that air even faster. So no matter the tank size the compressor duty cycle is still more important.
My tank is installed in a realitively safe place, just inside of the right rear tire bolted to the bottom of the body. A good place in case the overpressure valve pops open. That one would give you a scare if it was on the inside. Also makes it easy to drain any water out of the tank onto the ground.
-Secondary Pressure Regulator-
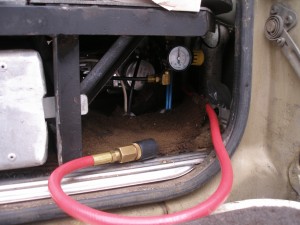 If you run air lockers you have seen that they require a specific amount of pressure to operate, not enough and they just don’t work, too much and you can blow the seals out of them. Since I installed a compressor that has way more capacity than my lockers can take I added a mini regulator and gauge. This way I can adjust the maximum pressure delivered to the lockers but still maintain the higher pressures of my system. This regulator allows only 80-105psi to my lockers while the main system might have 135psi or more in the tank.
-Air Connections and Hoses-
Sorry but I hate those stupid little coiled hoses that most vehicle systems use. On the other hand most shop base hoses are big and stiff and not to easy to store. I found an alternative in a hose brand called Flexzilla. What I like about it is that it’s really flexible even with pressure in the hose. I have found that a 25′ x 3/8 hose is a good all around size. This hose is easily stored and doesn’t have the features I hate about those coiled yellow hoses.
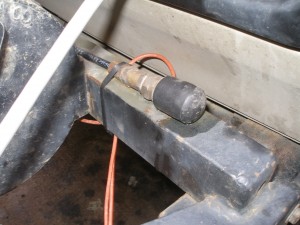 I made things a little more convenient by installing a couple of quick disconnects in my system. One is on the front bumper and another is on a short hose at the back. The one at the back is on the inside as I found that when using the system I have to open the back of my rig anyway so why not keep the connection out of the grime that accumulates on the tailgate area. The Quick Disconnect on the front is covered with a rubber boot from the hardware store to keep most of the dirt out of it. This front connection allows me to air up a rig directly in front of me with out moving the rigs around.
Air lines under my rig that tie the system together came from an unusual source. Flexible 1/4″ hydraulic tubing is readily available at marine supply stores and has a rating of about 500psi, way more than my system is capable of. This tubing is sold for trim tab systems and is reasonbly priced and easy to work with. Compression fittings with built in ferrules are available from just about any hardware store. I have also seen some other 1/4′” tubing that is very flexible and has the rating needed for a typical vehicle system. I think the company is Freeling-Wade.com but I am not sure
-Source and Cost-
Systems can be purchased as kits or in parts from various suppliers. Check the useful links at the top of the page. Primarily I used Viair components, compressor, tank and primary regulator. ARB solenoids for my lockers, plumbing parts from the hardware store, hoses and connections from the auto parts store. And when it was all said and done, my system (not counting any ARB components) cost around $400 which isn’t all that bad considering what it does for me.
-Safety-
Always use air systems properly. Make sure all components have a compatible rating as far as pressures go. Don’t ever over pressurize your system. And be sure to install the compressor according to the manufactures instructions.
-Without Air Tanks-
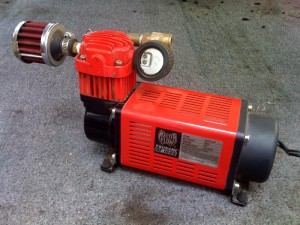 For those that don’t want or need an air tank in your onboard air system, you can have a perfectly good setup without. Like Tony says above, make sure you have a high duty cycle compressor or else it does you no good. I have a Master Flow Tsunami MR-1050 rated at 75% duty cycle. I have never had a problem with it cutting off except after Rubicon, and that was due to filling up another vehicle’s tires after mine. So for my vehicle’s use I have no problems with it.
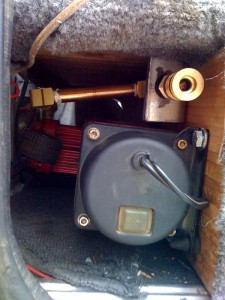 I originally had it mounted under the hood, and just recently moved it to the back for multiple reasons, one being so I can reach the trailer’s tires. I have modified the compressor a bit for my use. The fittings that come with it are not standard use, and only accepts the air hose it comes with. I ended up retapping the threads to accept 1/4″ T fitting and installed a safety relief valve. Changed out the cheap plastic air filter as well. Since there is no auto shut off, I have a open flow tire chuck fitting to allow air to flow when I am moving from one tire to another. That way I can keep the compressor running. I have also added some plumbing to fit the new location in the rear.
This setup is mainly for tires. I can blow some air around if I need to, but you can’t run any air tools. I have used this compressor for over three years without complaints, it has always been able to put air back in my tires at the end of the day.