By Tony K
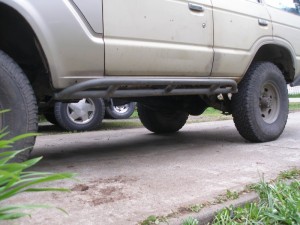 I had first thought about completely fabricating my own sliders, right up until I found out how cheap you could get them from Trail Gear. Trail Gear sells a set of sliders that are designed for a mini truck that are the perfect size for our wagons, 67 inches which is just about perfect. They are made from DOM tubing (which stands for Drawn Over Mandrel by the way, and yes I had to look it up myself). DOM tubing is generally stronger than the same size of HREW tubing. HREW tubing has a seam, just run you finger around inside and it will catch on the weld residue. DOM tubing also has a seam but you can’t see it for the most part due to the manufacturing process.
-Just Where to Mount Them-
Two key points to slider install, how they are mounted and where they are mounted. A couple of jackstands and some small pieces of wood helped me find the right location to install mine.
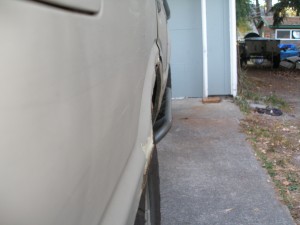 Mounting location comes down to a few simple guidelines. Just how tall your tires are and how much protection you are looking for. Taller tires and a lot of ground clearance will allow you to tuck them up pretty good as you won’t hit them as often. But for most of us this is not an option. Ideally your sliders should protrude past the widest part of your rig but they don’t have to stick out very far, about an inch is more than enough. This will make sure you pivot around obstacles rather than crunch your way by them. Tucking them in may get you over a few rocks but using them as pivots is no longer becomes an option. But you also do not want them sticking out too far as they get in the way climbing into your rig and on narrow trails they will hang up occasionally
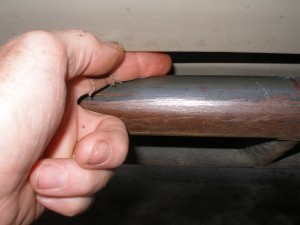 Typically on one of our wagons you need to keep them low enough to clear the doors. And this should include some room for them to bend and still not block your door at the end of the day. I left about 3/4 of an inch below the open door and a good thing I did as I bent the one on the drivers side at Rubicon last summer.
-Bolt On or Weld On-
Two options when it comes to mounting them, welding or bolting them on. While welding is a good way to go, I feel that bolting them on has far more advantages. With bolts there is no risk of damaging the frame by the heat of the welds or the possibility of developing stress cracks down the road. Bolts also make it easy to make repairs or replace a damaged slider. And it is a plenty strong way to attach them as I have jacked up the entire rig with mine and they did survive Rubicon….
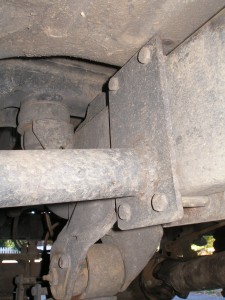 Once I had them positioned how I wanted, I made the plates that would hold them to the frame. I used three mount points. Each mount is made of 2 plates with 4 3/8ths grade 5 bolts. The plates are sized according to where they sit on the frame. Mine sit right next to the spring hangers with another mount between them. Don’t get too carried away with the thickness of the plates used to bolt them on. I used 1/4 in plate because if something bends I want it to be the mount plates not the frame.
I loosely bolted the mounts to the frame and then it was on to cutting, welding and grinding steel to connect the sliders to the mounts. I tack welded all the parts together and did the finish welding with the whole assembly off the rig, a lot easier this way. Clean up the ugly welds, admire the good ones, add a bit of paint and install them one last time.
Once installed in the proper location you will love having sliders. You will get over rocks without a lot of carnage and you will preserve the rocker panels in the process. You might even get around an obstacle that just wasn’t possible before.