Write Ups:
Contains all of Wagon Way's articles organized by categories. We have over 160 articles with more being written all the time and almost 700 photo's scattered throughout the site. Just click on the subject below to open up the index
- ►Inspiration and Opinions
- ►Land Cruiser Info
- ►Road Trips and Trail Stories
- ▼Tech and Fabrication
- ►Air Conditioning
- ►Air Systems
- ►All Things Electric
- ►Armor
- ►Axles
- ►Brakes
- ►Coolant Systems
- ►Diesel Engines
- ►Driveshafts
- ►Fabrication
- ►Frame and Sheetmetal
- ►Gas Engines
- ►Interior
- ►Just Plain Good Ideas
- ►Modifications and Changes
- ►Parts and Shops
- ►Steering
- ►Suspension
- ►Tires
- ►Trail Fixes
- ►Trailer Tech
- ►Transfer Case
- ►Transmission
- Thirst Quencher
- Roof Rack Ver 3.0
- ►Air Conditioning
- ►Trail Watch
- ►Wheeling Advice and Know How
- ►Inspiration and Opinions
-
As seen in Toyota Trails!
-
Shop Corner:
What's going on in our Wagon Caves?
-
Last Updated:
Articles that have recently had additional info or images added to existing "Write Ups".
-
- Lilly Re-powered Part 6: Gauge swap - 02-09-2015
- Get more from your torque wrench! - 02-07-2015
- Lilly Re-powered Part 3: Making things fit - 01-26-2015
- Lilly Re-powered Part 2: 3FE comes out - 01-26-2015
- Lilly Re-powered Part 1 - 01-26-2015
- Extra! Extra! - 01-25-2015
- Hood Light - 05-31-2014
- Rock lights - 05-31-2014
- Lights, camera, air. - 05-31-2014
- Swing outs... - 03-16-2014
- Shifting Springs - 03-10-2014
- ARB Bumper Modifications - 01-19-2014
- Fire Extinguishers - 01-17-2014
- Antifreeze Simplified - 11-03-2013
- No School, Like Old School - 11-03-2013
Tech and Fabrication
T-case Shifter Rattle
By Tony K
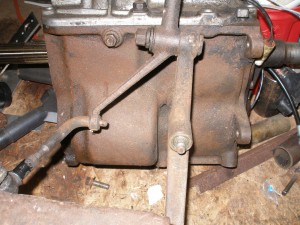 At first glance the shifter on our wagons is quite the contraption. What appears to be a single lever engages 4wd and moves between hi and low range. While it may seem to be simple, the lever doesn’t enter the t-case like the shifter on the tranny. The lever accomplishes all this with pivots and linkage. Moving the lever forward and aft shifts between 2 and 4wd and moving the lever left and right moves it in and out of low range.
Changing the Diaphragm on a 3B
By Tony K
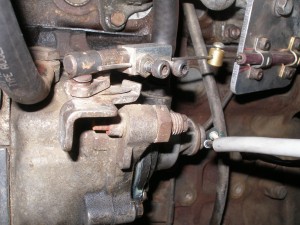 And just why is this diaphragm so important? Believe it or not (and some of the diesel mechs I work with are still amazed) there is no mechanical connection to the throttle on our 3B’s. Acceleration is controlled by vacuum pressure through this diaphragm. On most diesels the throttle actually moves the rack inside the injection pump, on our 3B’s the pedal just moves the butterfly in the intake which controls how much vacuum is applied to the injection pump which in turn moves the rack in the pump and hence, acceleration.
Leaking Head Gasket
By Tony K
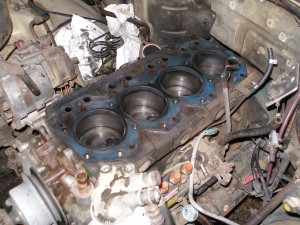 Well the rumor of aftermarket headgaskets (for the 3B) being less than desirable has come true on my wagon. Saw some anti-freeze dripping off the crossmember that required a closer look. Started up the motor and crawled underneath. Thought I should be able to see a leaking hose but that turned out to not be the case at all. Being that winter is upon us it’s pretty cold out so lucky for me as I looked up I could see steam coming off the back of the head.
Saving a Clutch Fork
By Tony K
Sad to say the clutch fork design on a BJ 60 is not the best. Not only is the fork prone to some very specific wear, short of pulling the tranny there is no easy way to remove the fork to fix it. But don’t despair as there is an easy way to work around this and it doesn’t require any sort of major tear down. At worst all you will have to do is remove the slave cylinder. And you only have to remove the bolts that hold it on, you can leave the lines attached so you don’t have to bleed it when you reinstall it.

