By Tony K
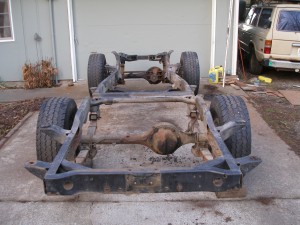
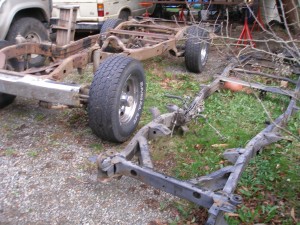 Essentially there were two frames used under our wagons, early (up to 84) and late (85 on). They were pretty much identical with the exception of how engines, trannies and other components were mounted. But late (88-90) model frames did get an additional crossmember layer at the rear which adds some strength. But do remember that no matter what engine and tranny combo was installed, any year body of the 60 Series will bolt to any year frame, all the body mounts are in the same location. My 82 BJ actually sits on an 89 FJ62 frame.
-Differences-
Some of the attachment points are very different. Obviously the engines have brackets welded to the frame at different points but these are easily removed and rewelded on a new to you frame. One of the other attachment locations may trip you up. And this would be the steering box. 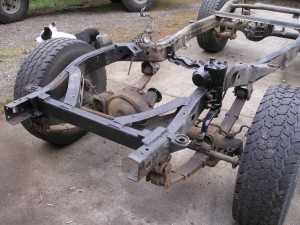 At first glance the older and newer style steering boxes look identical but the mounting bolt holes are not compatible. Early boxes use the same four bolts but they are in a rectangular pattern. On later frames (85 and up) they have a pattern that is more like a parallelogram (think leaning rectangle). In the pic to the right that is an early manual steering box mounted onto a newly modified late model frame.
-Adding Strength-
On closer inspection, the additional crossmember at the rear of newer frames (88-90 here in the states) is pretty simple . In reality it is only an additional layer added to the same crossmember used on the older frames. But it does add increased strength to the back especially for attaching a hitch or even tow points.
There were 3 different transmission crossmembers bolted into our wagons. And all three of them are different. The auto tranny mount is the furthest aft and bolted on from underneath. It also has quite a bit of angle built into it for one reason or another. The long case tranny’s also had a mount that bolted on from below but it is mounted about 9 inches farther forward on the frame. The other difference you will notice that while it is very similar to the auto crossmember it is built rather flat. No built in angle.
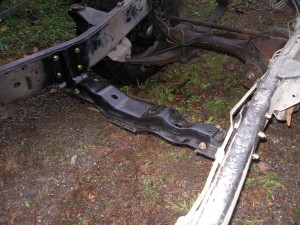 The older wagons had a 3 piece crossmember that bolted through the sides of the frame. This is the crossmember I prefer. Its easy to mount it in the frame for a swap, (just drilling, no welding if you prefer ) and being that the center section comes out it is easy to remove for maintenance and repairs.
-Crossmember Location-
While there may be 3 different cross members, surprisingly they were only mounted in two different locations. One for the auto and another for the manual. And even with the two styles of manual tranny’s, long and short case, both crossmembers for the manuals were still mounted in a way that put the rubber isolation mount (attached to the tranny) in the same location. They even use the same rubber isolation mount. And the 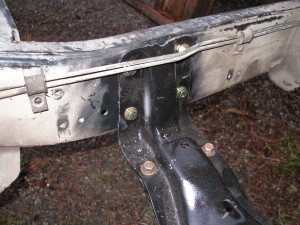 crossmember (as well as driveshafts) doesn’t care what manual tranny is installed on top of it. Newer and older style crossmembers are interchangeable when it comes to what manual is attached to it. And this also holds true if you are going to install an H55 in place of a 4 speed. My H55 sits on the older style crossmember and it didn’t require any mods. Must have worked because it never rubbed through Rubicon….
-What does it all mean-
It mostly means you have options when swapping tranny’s around. And you will find that a crossmember change is required when installing a manual tranny in place of an automatic. But even in this instance you still have options. Regardless of what you may have heard elsewhere you can use either an early or late style crossmember to support a manual tranny. But the auto style will only support an auto with out mods.
