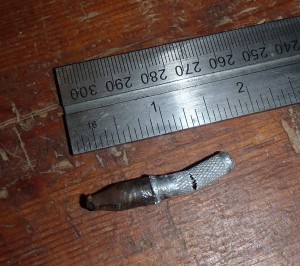
 No I am not trying to sell some new tires. The plugging I am talking about involves the repair of holes caused by less than desirable objects penetrating the tire. I just thought about this recently because I was doing some routine maintenance (translation: washing the mud off my rig) and found that object in the first picture in my spare. Who knows how long it had been there. It was deeply embedded between the lugs of my KM2’s. What may also surprise you is that the shiny blunt aluminum end was to the inside while only a 1/4 in of the pointy steel end was sticking out. And just so you know, some of the other pics are a junk tire I had in the backyard because I didn’t remember to take pics as I did the fix on my tire….
 Plugging is a really cheap and easy way to fix your tires and at the cost of tires these days its a really good idea to know how to do it.
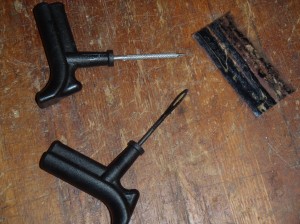
Tire plugging kits are available at just about any auto parts store and even the big box stores often have them as well. They are not very expensive at all. The one I bought several years ago came with two tools and about 8 plugs. One of the tools is for reaming out the damaged hole after you 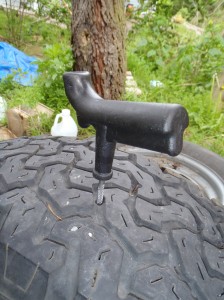 remove the offending piece of junk and the other is an insertion tool. The plugs are not really plugs but look like a small bit of rope soaked in some sticky rubbery stuff.
There are limits to just how big of a hole these will repair and fortunately I have not come across that limit yet. They won’t exactly fix a tear in the sidewall but for 95% of the holes we seem to get in our tires they will more than likely fix things and have you rolling again in only a few minutes.
 First things first. Remove the embedded object. It may be a good idea to first let some (or all) of the pressure out of the tire so the offending piece of junk doesn’t get launched in your face as it comes out. My tool of choice is more often than not a pair of channel lock pliers. Sometimes it takes quite a bit of grip on the object to get it out. And try to get a grip on the piece without enlarging the hole if at all possible, tires are not as thick as you might think. The reason being that the embedded piece of junk hasn’t really made a nice clean hole, its only pushed the rubber apart and
 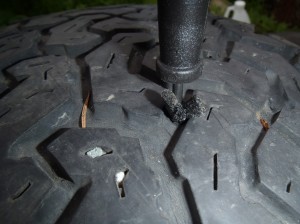 the rubber doesn’t want to get out of the way so it tends to hold onto the junk with a death grip.
The reaming tool is next. All you have to do is run it in and out of the hole a few times to clean it up so the plug has a better surface to mate to. If the hole is small this can sometimes take quite a bit of effort on your part. Thats why most of the better plug kits have “T” handle tools in them. Just a few swipes are OK, you aren’t trying to make the hole bigger just a bit cleaner.
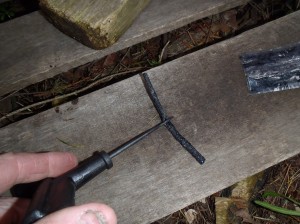
Now its time for the sticky part. You will notice the other tool has a bit of a looped end like the eye of a needle. You need to insert the plug material throught this eye so equall amounts protrude from each side. This can be a bit tricky to get it started in the eye but be patient as it will go through the eye with a bit of perseverance on your part.
Once the plug is in the tool pr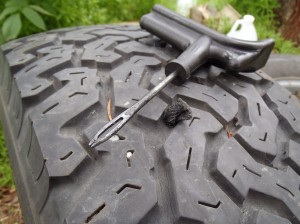 operly you can insert it in the hole. Push the tool with plug in until about a 1/4 in of plug material is still showing outside of the tire. Now comes the part that seems odd. With a quick pull, yank the tool out. The plug will stay in place. What you may not have nocticed is that the eye on the tool actually has a split in it that allows it to come out while leaving the plug in place. If the plug is between the lugs of the tire I don’t worry about trimming off the excess but if it’s on the tread that contacts the ground I will cut off the excess.
You should now be able to air up the tire and be on your way.
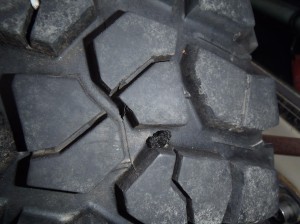 While the repairs done with these kits are meant for the tread area of the tire I wouldn’t hesitate to put one in the side wall if I had to and it was the only way to get home.
And don’t forget to add tire repairman to your list of skills….

