By Tony K
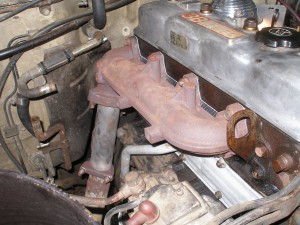
 Well the rumor of aftermarket headgaskets (for the 3B) being less than desirable has come true on my wagon. Saw some anti-freeze dripping off the crossmember that required a closer look. Started up the motor and crawled underneath. Thought I should be able to see a leaking hose but that turned out to not be the case at all. Being that winter is upon us it’s pretty cold out so lucky for me as I looked up I could see steam coming off the back of the head.
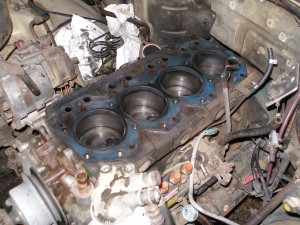
Unfortunately there is no hose or fitting where I saw the steam so pulling the head becomes my only option.
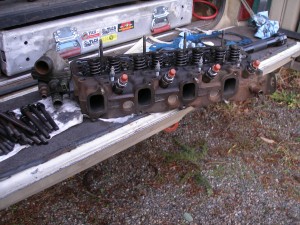 Found a few things that I didn’t expect to find in addition to the leak. One of the exhaust manifold bolts had fallen out at one time and a leaking injector assembly finally reared it’s ugly head and I can fix it when it gets put back together.
I will also be able to do a bit of modification while things are apart. I am going to re-route the fuel return line so it sends it back to the tank instead of the lift pump. Replacing the diaphragm will be much easier with the intake manifold in the back seat. And I can take off some of the old glow plug system components that were buried under the fuel injection system.
Might also come up with a new way to vent the crankcase and eliminate the road 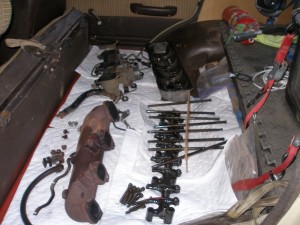 tube. Getting tired of the oil spot below the rig from the blowby. Modern diesels just vent it back into the intake and this is probably what I will do.
A leaky side cover is going to get replaced as well. I think I will fabricate a new cover out of much heavier material than the thin sheetmetal it is made out of currently. This new cover will take care of the need to block off the road tube as it comes out of it right now. The new cover will not have the tube.
The head gasket itself is definitely a piece of junk. After only 30,000 miles it failed. Leaking anti-freeze at the back and leaking internally down a couple of the headbolt holes, found a bit of carbon on two of the bolts. They should have only had oil on them. And once the head was off it was also coming apart in places it shouldn’t have been, delaminating and burning up around the cylinders. The new gasket appears to be made much better than the old one but only time will tell.
One added benefit of removing the head was the fact that I was able to check the condition of places you normally don’t get to see. I was pleased to find that the pre-cups showed no sign of cracking and there were no cracks in the narrow parts of the head between the valves which is not uncommon to the 3B. One little spot on the number four piston but other than that all the valves, pistons and cylinders looked good.
Re-assembly
Putting this thing back together started today. Given a choice I might not have picked today because the weather isn’t being very nice. No rain which is great but it’s only 38 degrees out! And once again I am doing this in the side yard, which is somewhat appropriate as this is the place I rebuilt the rig the winter before last.
If the head weighs any less than 90 lbs I would really be surprised. The last time I put the head on the motor, it was out of the rig. This time I am standing on a milk crate and leaning over the fender with the head hanging on my arms to set it in place, just about dumped me on my keister. But I did manage to get it on the block, bolted down and torqued.
Had to pull the side cover to get the push rods in. When I pulled the push rods out, one of the lifters came with the rod and fell over behind the side cover. But it was a blessing in disguise as I plan to replace the cover anyway. The old cover is also one of the problem leaks I am dealing with. The section of the cover that is behind the exhaust down pipe was not sealed at all. I think the heat of the exhaust just cooks it until the sealant on the gasket lets go. When I get to the point that the exhaust goes back on, I think I will wrap the pipe to keep some of the heat off the cover to see if that will solve it.
Torqued down the rocker assembly and called it a night, had enough of the temps for one night. Hopefully the weather will hold and at least warm up for the rest of the reassembly…
After talking with some of the mechanics at work I have decided to just put the side cover back into place and not worry about moving the road tube. What really started this thinking was asking my friend Craig (one of the best aluminum and stainless welders you will ever meet) about welding on the valve cover. Unbeknownst to me aluminum absorbs oil and there was a good chance that he couldn’t weld on my valve cover, or if he did the weld might not hold. Almost 30 years of sealing up the valves had put a fair bit of oil into the cover and it just isn’t thick enough to grind past the grunge. So I took his advice and decided to reuse the side cover as is.
Today was pretty much just like the day I started on the re assembly, really cold (just above freezing) but at least no rain. Spent about 8 hours getting it all back together, No real surprises other than having to add a stud to the exhaust manifold due to some rot in the heat shield that prevented re use of a bolt.
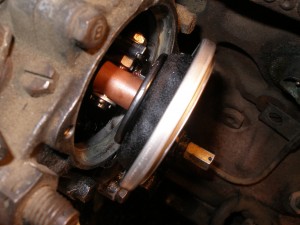 I got the exhaust manifold and exhaust reconnected first as this buttoned up the passenger side of the engine. The missing stud was an easy fix with a replacement from the hardware store. Still need to wrap the exhaust by the side cover.
Next was to replace the diaphragm in the injection pump. While the pump side of the diaphragm has a drain for oil that is not supposed to get in there, no such fitting on the outboard side. Once I pulled the housing I found the outer section was about a third of the way full of oil. Not so good for the leather diaphragm. Did find that the washer and cotter key were mostly missing from the previous install. And the guy who decided how this thing is attached should have his head examined. Getting the nut and lock washer installed that holds the stud to the injection rail was quite the challenge. Might be easy at the bench but my pump was still attached to the motor, can’t imagine doing this with the intake manifold installed. Fortunately mine wasn’t.
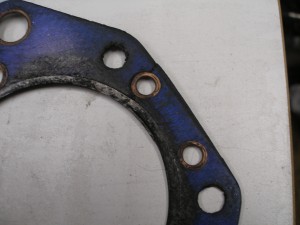 One thing I did find after taking a closer look at the old head gasket was the cause of my original leak. Pretty obvious that the crack in the gasket, right through a water journal was indeed the problem. In the picture you can see the crack pass right through that upper hole of the two lined with copper. And even if that crack didn’t exist the gasket was not long for the world due to all the other delamination problems it was having.
Managed to pull off the excess unused glow plug junk that was trapped below the injection lines. This was all leftover stuff from the superglow system. Also changed out a couple of heater hoses that were way past dead. Replaced the anti-freeze with pet friendly stuff as I don’t want my dog licking it up.
Before long I was hooking up the injection lines and having to get the spouse to help bleed the lines by turning the key. Now I will admit my wife has been extremely patient with me and with helping with little things when needed but tonight was a bit different. She has helped me do this before but once the lines were bled and the rig started and for some unknown reason she kept the starter engaged. I kept hearing odd noises and figured them out once she asked if she could let off the key now…. Maybe it was the cold that fuddled her brain. But luck was once again on my side as the starter wasn’t damaged. And it is just one of those things that we will laugh about down the road. I am laughing already and so is she. I think I am going to call her Starter Girl from now on.
One positive thing I noticed was that much of the pulsation in the 1 and 2 injection lines is now gone. Don’t know if this comes from tightening up the loose injector assembly or the new diaphragm but it’s good that it went away.
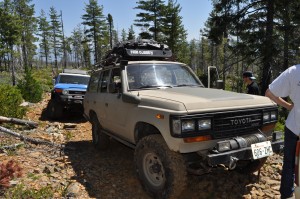 Let the motor run to get hot and cook out any of the water spilled into the engine when I pulled the head off. Left the oil fill cap off so the steam had somewhere to escape. Now that she was warm I couldn’t think of a reason not to take her for a quick ride. But I did keep it short since it was late, not to mention freezing outside. Pretty funny trying to drive my manual steering diesel tank after spending the last few weeks in a mini truck. Thank the stars that I once again have the use of my tank. Lets just hope this head gasket lasts longer than the last one.

