By Tony K
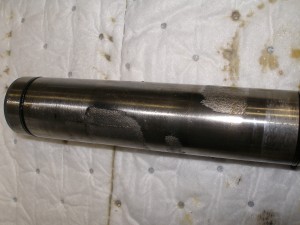 After quite a few miles and a fair share of abuse it’s time to rebuild my transfer case. The bearings are a bit tired, the idler shaft has started to wear and the main seal between the tranny and t-case has failed (a common problem with a lot of miles on the rig). And you are going to need more than just this write up. Think of it as a supplement to your service manual. What we try to share is what is not in the manual. So, first and foremost be sure to have a Factory Service Manual handy, preferably a paper copy. The Internet is handy but a bit of a pain to use with greasy fingers…
-Tools to Have-
When it comes to gearboxes the splitcase in our wagons is one of the easiest to rebuild. You don’t need all that many special tools either. Some special tools are required but you don’t have to get them from Toyota. A pilot bearing tool is handy for pulling the needle bearing in the end of the output shaft. All other bearings are easily removed with standard pullers or in the case of the bearings on the main output shaft a simple 12 ton press is a must have.
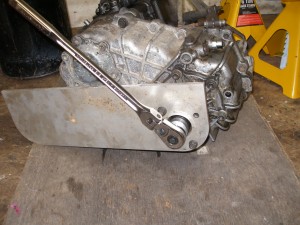 At least one SST is easily replaced by a simple piece of aluminum or steel. The one special tool better borrowed than purchased is the torque meter needed to set the preload on the output shaft bearings. And even this setting can be obtained another way. If you are old enough to remember beam style torque wrenches, the inch lb version works just fine in place of a torque meter. I have heard mention that the bicycle tool maker, Park, has exactly this tool still available and my guess is that it is far cheaper than a torque meter.
-Parts-
Lots of places to get the parts kit needed to rebuild the t-case. Mine happened to come from Kurt at Cruiseroutfitters. Great guy to deal with as far as I am concerned. The kit contains all bearings, idler shaft, seals and gaskets you will use. Even includes a couple of new seals for the drain and fill plug. The one thing I did have to purchase seperately was a set of shims for setting the preload on the out put shaft but these were not that expensive.
-Tear Down-
You can do this with the tranny in the rig but I don’t recommend it. Not a big deal but when you get to the last steps, having it on the bench will make your life much easier. Not that pulling the tranny/t-case combo is all that fun but it makes sense. If you have a buddy familiar with our wagons all that much better. When Eric and I have been able to work on a rig together things go surprisingly fast, we once pulled two trannys, one manual and one automatic in about an hour. That was a fun day and a lot safer having the two of us to move that heavy gearbox combo around.
 When I have been stuck by myself I have found a bit of piece of mind by attaching an engine hoist to the tranny as I jack things back into place. Because I have to admit moving that much awkward gearbox into place is not easily done by one person.
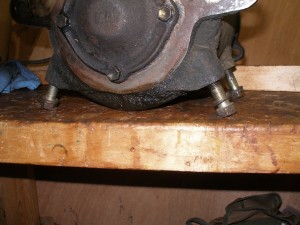
Once the gearbox is on the bench, using the bell housing bolts for feet makes things easier. Just thread them into the crossmember mounting holes.
Unstaking the nuts on the shafts is easily done with a punch or even an old screwdriver modified for this purpose. Be careful not to mangle the threads on the shafts. Holding things while you loosen the stake nuts is easily accomplished using that flat plate I mentioned earlier, mine is just a piece of aluminum with the flange bolt pattern drilled into it with a clearance hole in the center for the socket.
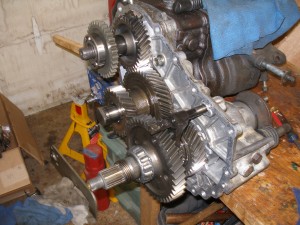 As you seperate the case be ready for the output shaft to fall out. It may not, but you don’t want it to slam into a concrete floor. My one unwanted adventure at this point was snapping a bolt off when pulling the bolts. Yes the aluminum is that strong when it corrodes around some steel. But this wasn’t too bad as I was able to drill it out and retap the hole to clean out the threads.
Sometimes the bearing on the output shaft of the tranny needs a puller to come off as well as the main transfer/idler gear. After you seperate the front half of the t-case from the tranny it’s easy to replace the main seal between the gearboxes and you can get to the front output bearing on your press.
-Re assembly-
The first thing I would do is to re tap all the bolt holes to clean out any corrosion of the aluminum. Remember that broken bolt I mentioned…
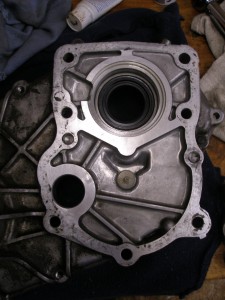 Start by replacing that seal for the main tranfer gear on the tranny output shaft. And just in case you don’t remember, the spring side of the seal should face the side with the fluid you are trying to hold in… This seal is probably the single largest contributor to t-case failures. Once it wears out all your t-case lube gets pumped into the tranny. I did run a bypass hose for awhile until I was able to tear down this t-case. Once the seal is replaced and the bearing for the output shaft are replaced you can put the front half of the case back on with a new gasket.
At this point I pretty much stick to the FSM with the exception of some of the SST’s. Carefully chosen pipe sections can replace some of the SST’s with cautious use of a mallet and also on the press. Surprisingly even Toyota makes use of sockets on the press. The other diversion I make not mentioned by the FSM is to use Anti-seize on the bolts when putting the t-case halves back together. This prevents the dis-similar metals corrosion responsible for the broken bolt on my case. Be sure to reduce the torque settings when using anti-sieze, 15-20% is the range I have seen mentioned.
About the only thing I found to be a bit of a pain is to align the hi/low shift lever as the case halves come together. But with a bit of patience this is easily overcome.
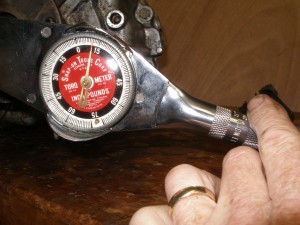 Don’t skimp on the preload settings of the output shaft. While someone may say it’s OK to just reuse the shims of your original set up, don’t. You may end up with the bearings being too tight or too loose, neither of which is a good situation. I had to take the output housing off several times to get the preload correct prior to adding sealant and torqueing it down for good. And while the FSM is vague I did use a dry gasket to set the preload. If you don’t, adding the gasket will reduce the preload settings.
-Back in the Rig-
As long as your were (mostly) faithful to your FSM it’s time to reload the montser pile of metal back into the rig. I once again relied upon my engine hoist to move the tranny onto my floor jack and provide a bit of a safety factor. And before I knew it, I was torqueing the tranny to the bellhousing. Hook all the little stuff back up and it was time for a test drive. First run was down the highway, things got warm but not too hot and didn’t find any unwanted drips.
-Break In-
Jury is still out on this. Haven’t been able to find much info on the need or not to break in the bearings etc inside the t-case. So for now I am just going to treat her gently and see how things go. Probably change the 90wt at 500 or 1000 miles just to be on the safe side.

