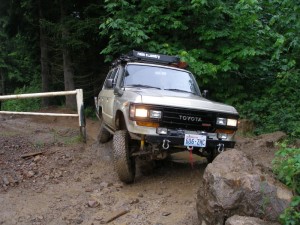
The stock suspension is a bit on the weak side after 20 odd years (or more) that these rigs have been on the road. But fortunately for us there are a lot of options available. You could just replace the stock springs but I feel there are better options out there.
-Add a Leafs-
For a couple of years I ran add a leafs on all four corners. This added about an 1.5 inches to the ride height and gives plenty of room for 31 in tires. Any bigger and you will more than likely have some rubbing issues. Add a Leafs are available in two versions, a short and a long leaf. They both raise the rig about the same amount but the long leaf will give a better ride so thats what I went with. This is a good way to go if your budget is a bit on the tight side. Wasn’t much more than $100 for all four of them including the new center bolts.
Eventually though, I realized to get what I wanted I needed to change out the entire suspension.
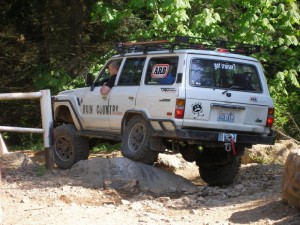 -Whats on our rigs-
ARB provided most of the solution. We both run Old Man Emu springs which are imported by ARB. While I pretty much ended up with a complete OME set up, Eric has a mix of other components.
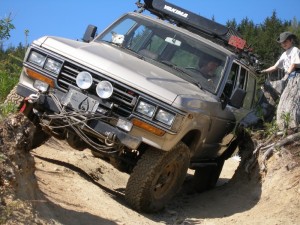
These wagons are heavy so pretty much stick with the heavy duty components. We both installed what most people used to call the “Heavy” version. It goes by a part number now but I don’t recall what it is, so just remember to buy the heavy duty springs and you will be good to go. I also bought the heaviest OME shocks available and couldn’t be more pleased. I have noticed my rig has a lot less roll when coming off rocks and other obstacles. Road manners are also very good. And as you can see in this picture of Eric’s wagon the articulation is pretty darn good for a leaf sprung rig.
This set up from OME provides plenty of ground clearance and will lift the rig about 2.5 inches, give or take a bit. This gives you plenty of room to run 33 in tires. Narrower tires (9.50 or 10.50’s) don’t rub at all but the wider ones may have some rub issues when you are turned at full flex of the springs. It is also a good all around set up as it doesn’t mess with the steering geometry and requires no changes the driveshafts. And the ride height is still reasonable for your spouse to climb into the rig.
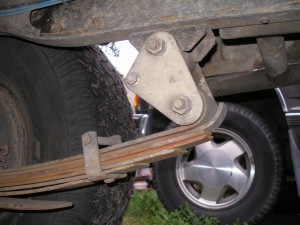 Anti-inversion shackles can prevent an extremely dangerous situation from occuring and ARB again provided the solution. While preventing the springs from inverting they also have grease fittings and are about a 1/2 in longer than stock. If you don’t know what inversion means, it’s when the spring flexes enough to allow the shackle to swing up and jamb against the frame. The danger comes when you pry it back into position. It can pop back into position with a scary amount of force. Anti-inversion shackles have an extra bolt that prevents this from happening.
I did find that the front springs I chose were a bit soft so I had to add an extra leaf to level out my rig. I used a leaf from Man-a-fre but ARB does make extra leaves for their springs. Which is what I added when I found the need for a little extra support on the rear of my rig. When I added these to my rear springs I removed one of the overload springs so I didn’t need to install a longer center bolt in the spring pack. And don’t forget to grease the extra leaf during the install as this should help prevent some noise in the springpack down the road.
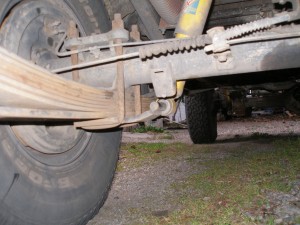 The one thing I found to be of an immense benefit was not made by OME. They are U-bolt flip kits. They get those offending nuts and u-bolt ends moved to the top so they stop catching on rocks. They are made by 4+ by Dave Gore in Arizona. He sells them through Man-a-fre and they are a great product that is well made. Another feature of them is that they also raise the shock mounts a couple of inches. While I may still occasionally whack the lower shock mount it is definately less with Dave’s flip kits.
After piece mealing my suspension together over time my best advice would be to buy a complete kit if you can swing the cost. But if not, there is no reason not to buy the pieces as you can afford them.
–Installing a new suspension–
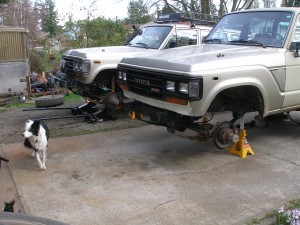
Always keep safety in mind when working under your rig. Use a good floor jack (use two if you can get ahold of a second one) and always use heavy duty jack stands, at least 6 ton stands. Its not that smaller stands won’t support the rig, the heavier stands just have a much wider base and are safer to use.
 Be sure to follow all instructions that come with your components, especially the torque specs for all bolts. Remember these bolts are holding the axles onto your rig. And if you can’t find or don’t get any torque specs just follow the specs given in your factory service manual. Also once you have put a few miles on your rig be sure to re-check all the new bolts for the proper torque, they just may settle in a little and double checking the torque is not a bad idea.
If you forget which end of the springs goes where, just remember the military wrap goes to the fixed pivot on the frame. The shackle gets the other end of the spring. The military wrap is the end of the spring that has the second complete leaf around the spring eye if you didn’t know.
You may find it is easier to cut off the old u-bolts than trying to unbolt them. Years of rust are horrible to try to crank off the nuts, especially nuts that were torqued on at over 100 ft lbs. The other joy to remove is the old shackles and I don’t mean the nuts on them. Most of the time the bolts are corroded and fused to the rubber bushings in the spring eyes. Hammers and pry bars are indispensible. So is patience.
Don’t even think about changing a spring on one corner at a time. When you lift one corner of the rig there is a lot of tension on the suspension and it will just make your job easier if you lift up one entire end of your rig and change out the entire suspension on that end.
 Just how long will it take to change out the entire suspension? As long as you stick with it you should be able to do this in a day as long as you don’t run into too many corroded problem fasteners. And while you may be pleased by the lift when you first put it on, don’t get to worked up as it will settle several inches over the next week or so, maybe sooner if you go wheel it hard right away.

